Covid-19 has slowed the delivery providers to somewhat of a crawl, but I think FedEx is handling it better than the others. The Maxi-Korg was delivered only a few days later than was initially estimated. I didn’t take any pictures unpacking it – looked just like the auction photos. Was poorly packed, but somehow made it with only one of the rubber feet poking its way out of the box. I can live with that.
When I spend more than a few hundred dollars on something I tend to dig right in to see what I am up against. The sliders and pots were really sticky and hard to move so I opted not to turn it on, but rather save that fingers-crossed moment for after replacing all the electrolytic and tantalum capacitors. No sense in risking too much electricity getting through a shorted open capacitor and taking out a transistor.

This is where I am reminded I need to take more pictures when doing these rebuilds. My order of operations I like to follow when redoing a synth is below. Try not to start any of these if you don’t have a good place to work where you can leave things apart for a few days to weeks if needed, and don’t underestimate how long any of these steps will take.
Take it apart and see what needs doing – especially noting any knobs, slider caps, sliders, pots or screws that are missing or that I should replace
Take apart and clean the keybed
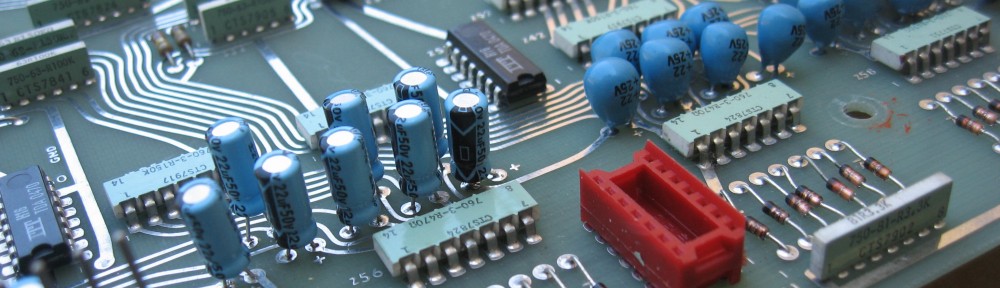
Make a list of electrolytic and tantalum capacitors – I replace all in something I plan on keeping
Vacuum it out
Check for broken wires in connectors or where wires are soldered to boards and fix any I find
Order any parts and capacitors I don’t have in my stock
Replace capacitors
Repair, clean and lubricate and controls
Refinish if possible or replace any wood from the cabinet that needs it
Put it together and test it
Do any calibration it may need
It took 45 minutes to get this thing all apart so I could work on it. Wood cheeks took 3 screws each to remove. Wood blocks at either end of the keyboard had two each. Fascia is held on by a bunch of screws, all fought being removed mostly because I didn’t have a perfectly suitable screwdriver for their particular size of philips cross, but of course finally came off. All the controls are mounted to a sheet metal panel and that panel is on a frame that mounts with 4 screws in the sides of the big sheet metal enclosure. Keybed is held in place by some screws you have to remove from the underside. These are M6 I think, and they were big enough that even though they were pretty well stuck, they came off quickly since there was a good grip from the screw driver.


Up next: Part 3: replacing capacitors
